Import Tags
Learn how to utilize tags to upgrade your workflow
What Are Auto-Import Tags?
Tags are attached to the names of Figma nodes to modify import behavior. This is how, for example, you can export something as a ScrollingFrame instead of the default ImageLabel.
To add a tag to a Figma object, edit the name and add any number of tags by name, separated by the @ symbol. For example, if I want to auto-export something named “TestButton” as a group and a button, I would rename it in Figma to “TestButton@GROUP@TYPE_BUTTON”.
Here is an example of tags in action:
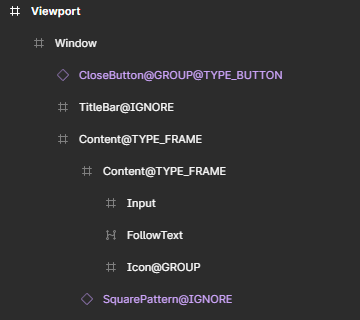
Tags are written in
@UPPERCASEformat! For example, the “group” tag is written as@GROUP. Tags can be stacked, separated by@.
Tags
Below are the current tags usable for imports. Incorrect tagging is ignored and won’t error.
GROUP
Groups a node in export. This means that no children will be exported under it.
IGNORE
Nodes with @IGNORE in the name will not be included in exports.
TYPE_FRAME
Declares the exported node to be a Frame class type in Studio. Frames, unless otherwise specified, export with a transparency of 1 and with a corner radius of 0.
TYPE_SCROLLING_FRAME
Declares the exported node to be a ScrollingFrame class type in Studio. ScrollingFrames, unless otherwise specified, export with a transparency of 1 and with a corner radius of 0.
TYPE_BUTTON
Declares the exported node to be an ImageButton class type in Studio.
TYPE_TEXT_BUTTON
Declares the exported node to be a TextButton class type in Studio.
TYPE_IMAGE
Declares the exported node to be a ImageLabel class type in Studio. This is the default behind the scenes.
Where Are Tags Used?
Tags are functional with automatic exporting/importing. You can go see how it’s relevant on that page!